What To Pack on Trail: Our Recommendations
Each hike is unique, and various factors will determine what you need to pack and how much you need to pack. These include the facilities available, the terrain you will cover, the length of the hike, and the weather conditions you will face.
Keep in mind that we are not experts. We’re just ordinary people who are passionate about hiking (and we do a fair bit of that). We also have a few good gadgets, which we keep adding to every time we visit our local outdoor and camping shop, The Great Outdoors, in Hoedspruit.
Let’s get packing!
Things To Pack for a Trail
Here’s everything you should consider packing for your upcoming hiking trip. These include general kit, the type of hiking clothes, cooking supplies, gear, and toiletries you may need.
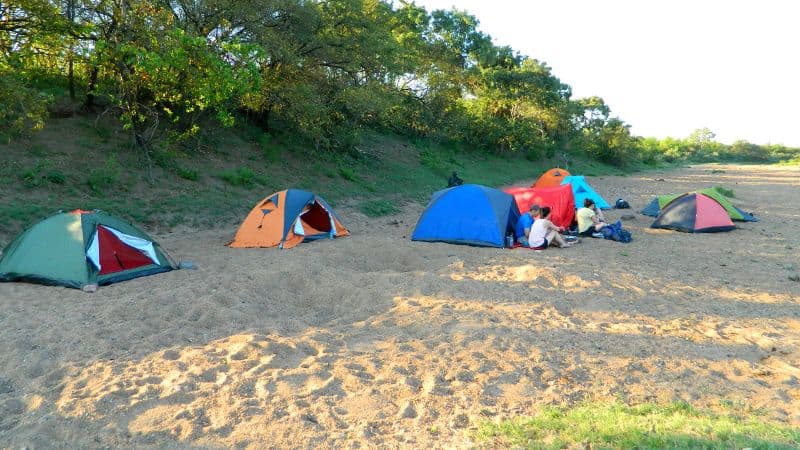
Table of Contents
General Gear
What size backpack do you need? And do you need a sleeping bag? Here’s what you should keep in mind when packing your general gear.


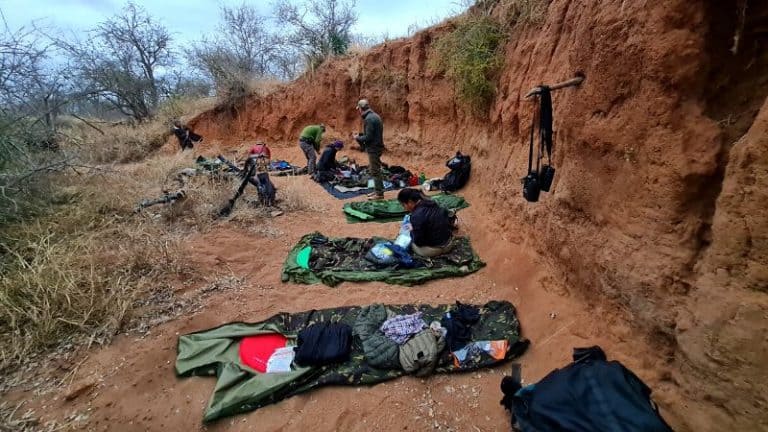
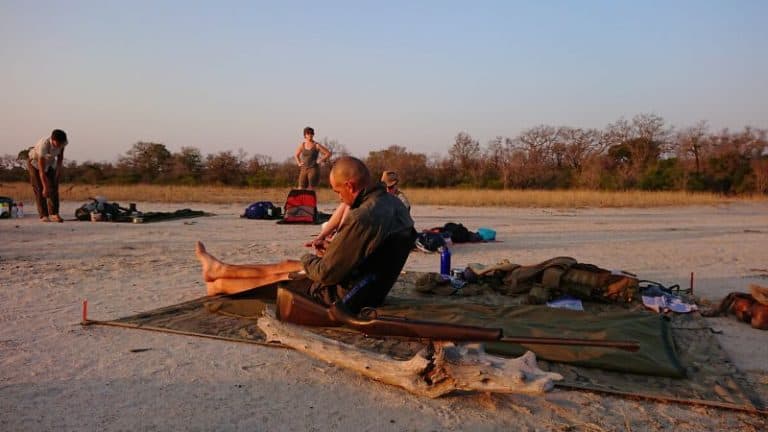
The usual recommendations are 75ℓ for men and 55ℓ for women.
But please bear in mind that these sizes are an average recommendation.
Women typically carry smaller packs than men. The ideal weight for a packed backpack is roughly 15% & 20% of your own total weight.
But there is a well-known guide from the Lowveld whose mantra is something along the lines of “carry like a donkey, sleep like a king.”
If you are hiking somewhere that isn’t too mountainous or windy, then a large poncho that fits over you and your pack is a great idea. It’s easy and quick to put on and light to carry (always a bonus). When we’re on a primitive trail and don’t have a tent, we usually lay the poncho over the bag to keep the dew off.
If you are hiking somewhere like the upper Drakensberg or Rim of Africa, where there might be heavy rain and powerful winds, and the trails might be a little more precipitous – you really don’t want your or someone else’s poncho flapping around your face. In that case, I would recommend proper rain gear consisting of pants and a top with a hood.
I cannot emphasise enough how important this is.
There is nothing worse than being cold when you’re sleeping outside and consequently not sleeping well. If you’re in doubt about the expected temperatures, go for a bag rated for lower temperatures. You can always unzip the sleeping bag if you get too hot.
Some people debate whether this is necessary. But I always carry an inner for the following reasons:
- It adds an extra layer that helps keep you warm.
- If it’s hot, you have a sleeping bag sheet, and you can unzip your sleeping bag more for room to move.
- It helps to keep your sleeping bag clean, and it’s super easy to wash the inner bag.
Phew – more considerations here. In the old days (when I was still at school), we used those thick, solid foam sleeping mats. They’re light, but they are hellishly bulky and not very comfortable. However… they don’t deflate in the middle of the night!
Then you get self-inflating mattresses. They have some padding, but you inflate them to give you that little bit of extra comfort. They’re good and light. And although they’re definitely bulkier than a purely inflatable mattress, they do have a small layer of padding which helps if they deflate.
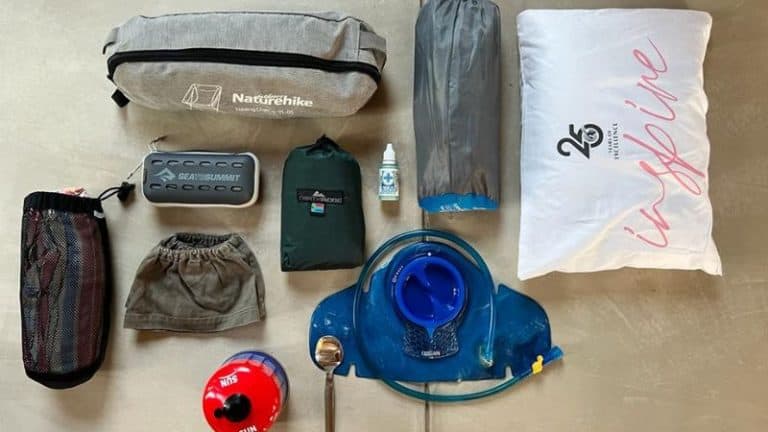
The inflatable hiking mattress. I have a Naturehike FC-10 one because it’s light at only 600g and packs up really small. You can inflate it yourself or buy the inflator dry bag.
This is one of those things that you might initially think, “I don’t need that, it’s just an extra expense,” but as an inflator, it’s amazingly effective.
And it’s also handy to have as a dry bag for your clothes or whatever you might want to keep dry. So, in my humble opinion, I would buy the inflator bag as well.
It comes with a small patch kit, but this is only useful if you can identify where the puncture is.
A good tip however is to also pack a small piece of camping mat that you carry on the outside of your pack – it’s useful for sitting on and I place it underneath my hips, under my inflatable mattress. I use a piece of a Sundick camping mat that someone gave me on a Rim of Africa hike.
I have a Lumeo head torch. They are pretty good – and the fact that they are rechargeable is a good eco-friendly bonus.
I am sick of dim torches and constantly replacing batteries, so I love the lightness and flexibilityof my Lumeo.
That said, ensure you’ve fully charged it before you leave, and as with all things these days going higher-tech, and or on a longer hike, it might be an idea to take a solar charging pack with you.
I take a small Leatherman Micra multitool with me. It’s not as big, heavy, or bulky as a full Leatherman, but it still has a small blade, various other tools, and a small pair of scissors (which I actually think are the most useful item).
A good-old paper map is always handy and often gets overlooked these days with our slavish adherence to smartphones. A hard copy map won’t run out of battery, and it isn’t reliant on GPS (just make sure you know how to read the map).
You might have several considerations here. Bladder or bottle? Plastic or metal? Typically, I take a 1.5ℓ water bladder and a 2ℓ plastic bottle. I like the bladder for the ease of access. I wack it in the top of my pack and have the mouthpiece hanging down so I can drink at any time.
But, bladders can get punctures, which means that whatever is next to them can get wet. And if you don’t have a puncture kit (see mattress patch kit), then you are limited in how much water you can carry. Needless to say, this can then become an issue for you and your fellow hikers.
So, that’s why it’s always a good idea to take at least two water-carrying items. Hence the plastic two-litre bottle. It’s light, easy to fill, and easy to pour from. Now, it’s not as eco-friendly as metal, but it’s definitely lighter.
I always carry my water purifier drops and a hand pump water filter. Mine is an MSR TrailShot Pocket-Sized Water Filter. It’s not the biggest or fastest, but it’s small, light, and does the job.
I prefer it to the Sawyer Mini Filter, as I found that it seemed to get blocked more easily. But it is twice the price as well. However, that’s just my opinion, and it may well have been to do with the quality of the water.
The water purification tablets or drops are just in case I need them, and I often find myself lending them to others.
Many hikers don’t carry filters, I just think that it’s fairly rare to find truly fabulous, clean water so I’d rather be safe than sorry.
Whether you’re taking a tent or a bivvy is probably dependent on whether you’re on a primitive trail or not. For hikes in Kruger, you have to take a tent. On primitive trails, you obviously don’t. In the Drakensberg, it’s advisable, even if you’re aiming to sleep in huts and caves.
Tents are a whole other subject in themselves, and the variety, cost, sizes, etc., are endless. Here are some of the most important things to consider:
- How many of you will be in the tent?
- Can you share carrying different tent parts, or do you need your own one-person tent?
- What is the weather going to be like on your hike?
- Is it going to be windy and or wet?
- If you’re hiking in the desert, you might be able to get away with a tent with a light flysheet, but you also need to consider whether there will be dew.
I would typically try and find out what other people have used on that same trail and take the anticipated weather into account.
I reckon this is pretty much a must-have if you are sleeping under the stars.
But whether you need to buy your own, or can rent or borrow one is another matter.
They help protect your other kit (specifically mattresses and sleeping bags), they are an additional layer for warmth, they keep the dew off, and they can keep an amount of rain off you.
You get different types of bivvy bags, of which nylon and canvas are probably the most common. Canvas is heavier but more durable. However, it’s possibly not as waterproof. Nylon is lighter and ostensibly more waterproof, but it can definitely rip more easily.
Either way, investing in one with a hood is a good idea.
Note: I don’t have my own bivvy – I always manage to borrow one or the trail provider has some available.
A groundsheet is helpful for putting all your stuff on so that you don’t get sand or thorns in everything. It also forms one more layer between the ground (and thorns) and my inflatable mattress!
Try to look for one that’s waterproof or water-resistant because if the worst comes to worst, you can try and string it up as a shelter or just drape it over you and all your stuff.
If you’re still hiking or don’t have a tent while it’s coming down with rain, you are highly likely to get wet, and at this stage, it’s just about how wet or muddy you’ll get. If you don’t have one in a situation like this, you will probably end up wishing you did!
I have a friend who has a slightly smaller groundsheet than mine, but it has a silver foil backing which supposedly helps to keep cold from the ground. It’s really light, a good size, and she’s had it for ages. But we don’t know where she bought it. Just saying. Sorry.
Cooking
There are a few products that make cooking on the trail easier. Here’s what I’ve found works best for me.


This item is pretty evident and necessary. There are typically two different sizes to choose from, but a small can will definitely be more than enough for a 3-night trail – especially if you’re using cook-in bags as you then tend to use less gas.
The big debate on the last couple of trails I’ve been on is whether to choose a Jet Boil stove vs a more traditional Fire Maple cooker.
A standard screw-in camping cooker with a couple of pots is undoubtedly best if you are doing traditional cooking in the pot. In this regard, the first iteration of a jet boil is just too fast and hot, and everything burns.
But if you have your food in cook-in bags, then a jet boil is the bomb. It’s super fast to boil your water, you pour the water into the cook-in bag, and there’s no cleaning! Another plus is that your coffee won’t taste like last night’s Red Lentil Dhal!
But…Jet boils are significantly more expensive than a standard cooker.
Most camping stoves these days include a pot and a lid. Most hikers tend to eat directly out of the pot, or as things are heading these days, directly out of the cook-in bag. So typically, there’s no need for an entirely separate pot set like there used to be.
Thank goodness the days of meths-burning stoves and bulky rectangular pots are long gone!
Some stove sets come with a “clicker” to light them so that you don’t need matches or a lighter. On my jet boil , this works brilliantly. However, it no longer works on my Fire Maple stove, which is a pain.
So, it’s great if you want a stove with a self-lighter, but I would suggest packing matches or a lighter regardless. You definitely don’t want to be in a situation where you have a stove that you can’t light.
Then the question begs, lighter or matches? Personally, I am a fan of matches because the less plastic there is in the world, the better, but make sure it’s in something waterproof. I actually also carry a magnesium flint and steel striker (it really is a just-in-case item).
I usually take a reusable coffee mug with a top, as it just helps keep the drinks warm and the bugs out. Others may prefer a metal mug, but I would definitely go for one with a double hull – they keep your drinks hotter, and you won’t burn your lips as much!
Pack a fork, spoon, knife, or spork to save space. Typically, you can get by with only a spoon or a spork. If you need a knife, your pen knife or Leatherman tool will come in handy.
(Did you know that the Leatherman is named after it’s inventor? Mr Tim Leatherman!)
A small piece of sponge or similar is useful. I actually use a coir scrubber that I have cut in half. However, since a lot of hiking meals come in cook-in bags these days, the requirement to scrub your pots is much less. It’s still useful to pack.
Please try and ensure that it is as eco-friendly and biodegradable as possible. There is enough rubbish in our waterways as it is, so let’s do our part to keep things as clean and pollution free as we can.
And again, with the advent of cook-in bags a little elbow grease should easily suffice.
Clothing
Not everyone’s clothing list will look the same. Some of us get cold faster than others, while some of us don’t feel the need for a crisp change of clothes every day. Here’s my standard recommendation for clothing.

With the advent of trail running, there has been a considerable improvement in the types of shoes available for hiking. My thoughts are if you’re doing a reasonably rocky or mountainous hike, such as Rim of Africa, then proper hiking boots with ankle support are a good idea.
If you’re on a less technical hike that’s on a flatter landscape, then a good pair of Saloman’s will work just fine. A lot of this comes down to personal preference, though.
That said – make sure you have done some decent hiking in your shoes or boots before you leave for your hike or trail. Once you’re out there, there is not a lot you can do about getting blisters while you’re down the Fish River Canyon, up Sentinel Peak, or in the middle of the bush.
I also recommend making sure that you have a bit of extra space in your shoes. I always find that my feet swell a little once they get hot, and I’ve been walking for a while.
If you’re hiking anywhere with lots of grasses, sand, and thorns, then gaiters are a fantastic addition.
There are many different types but look for ones you can easily get over your shoes or boots. Again, I prefer a tougher material than something that will snag or rip easily.
Whether it’s flip-flops, Crocs, strops, or something else, it’s always a good idea to have a comfortable shoe that you can slip on after a long day of hiking.
I’m a fan of strops because I can wear socks with them, which keeps my feet warm and clean (and I don’t get camel-toe foot!). They are also less likely to get thorns through them like thin flip-flops.
Packing one of these items is an excellent idea if you’re hiking in winter or somewhere cold, particularly if you aren’t sleeping in a tent.
Fingerless gloves are my go-to here. They work to keep my hands just warm enough on night watch, but I don’t keep having to take the gloves off to use the gas stove, etc.
If you can take technical gear, do so. It dries much faster than other fabrics. It’s not absolutely necessary, though.
I would recommend one light long sleeve shirt since you can use it on hot days to stop sunburn or as an extra layer on cold evenings. Again, how many to carry depends on how much you sweat and how much you’re prepared to carry.
Everyone is pretty manky by the end of a decent hike, so I always think less is more. But make sure your clothes are in a dry bag – you don’t want to be cold and wet and have no dry clothes to get into.
More modern technical fabrics are good because they tend to dry quicker. They also don’t snag or rip too easily. You don’t want a material that picks up every stick, leaf, or thorn along the way.
I usually take one pair of shorts, one pair of First Ascent trousers with the option to unzip to shorts, and one pair of leggings for night-time.
Some people prefer to hike in trousers, but it comes down to preference. I like the flexibility of the trouser/short combo.
Layers, layers, and more layers. Definitely take thermals if you are hiking in the Drakensberg in winter, for example. I think this item is dependent on what hike you are doing and when you’re doing it.
It’s definitely a good idea to pack a jacket, and if you have one that is at least wind and water resistant, all the better. The K-Way fleece jackets that squash up super small and are very light are great, but they are pricey. They aren’t the toughest jackets out there, so just be careful that you don’t catch it on anything.
Just make sure whatever you choose is comfy!
A lot of this is again about personal preference, but 3-4 pairs are usually good. If your feet and shoes are likely to get cold and wet, then proper woollen hiking socks might be the best – but be careful that they don’t make your feet too tight in your boots/shoes.
Good socks are important, but you will need to establish what works best for you.
I use several different sock types including Falke and Quechua.
If you have a decent water-resistant jacket and a good poncho, then you may not need another specific rain jacket. Again, assess where your hike is and what weather can be expected, and plan accordingly.
If you are sure you’re going to swim, pack it! It also depends on who you are hiking with – if it’s an all-same-sex hike, then just undies might suffice. It’s your call to decide what you’ll be comfortable with.
This is essential. You’ll have to decide between a cap or a wide-brimmed hat. I typically go for a wide-brimmed hat to stop sunburn on my face, neck, and ears.
A plain cap is a good idea if a wide-brimmed hat is not up your alley, but just make sure you don’t get sunburnt, as bad sunburn is a sure-fire way to ruin a good hike.
I never hike with sunglasses, but that’s just my preference. I find I get too sweaty, and they slip down my nose, and then if I have to try and stash them somewhere, they undoubtedly get squished.
First Aid Kit
If you’re on an organised guided hike, then you may find that the organisers have a decent first aid kit. And if not, or there are items that you want to take with you, then I would suggest sharing the first-aid kit amongst the group.
Typically, we have one first-aid bag, and it gets passed around so that everyone carries it for a while. Below are some items that could be included in your first aid kit.
For the real deal – take a look at Trail Food’s Ultimate Hiking First-Aid Kit.
To be honest, I haven’t ever carried this. But maybe include some Voltaren gel if the hike is very strenuous.
These are always good to have, just in case.
Again, always good to have. I find the material plasters to work better, as they don’t come off as easily as the more plasticky plasters.
This is up to you. I prefer to try and dry any grazes or scratches, so I typically take a wound powder instead of a cream.
These are useful for blisters on a longer hike, often used in conjunction with Vaseline.
If you’re on a long, strenuous hike, then a tiny tub of Vaseline is a good idea. Here’s how I treat my blisters:
- First, let the fluid drain from the blister, leaving the overlying skin in place.
- Apply Vaseline/ petroleum jelly to the blister and then cover it with non-stick gauze.
- Finally, apply a plaster on top of that.
A needle might also be handy if you need help draining the blister.
Probably useful to have a couple of Valoids or something similar – just keep an eye on expiry dates.
I am fortunate to have guts of steel, but again taking a few pills (like Imodium and Buscopan) doesn’t take much space, and you’ll be beyond grateful to have them when you need them.
Just carry a couple of sachets of this quick, easy option. Dehydration can happen to anyone if they’re not careful.
Toiletries & Personal Items
You don’t need to pack full-sized bottles with your toiletries. The smaller, the better!
Definitely take a fast-drying microfibre towel. I have a Sea to Summit pocket towel . There are two sizes, but I reckon the smaller one is sufficient.
Decant this into a smaller container if necessary. Or just do without it and use water!
I do decant and take a little bit of cream, which I use on my face and hands in the evenings.
Single-ply toilet paper is typically lighter and burns more easily. Some hikes, like Rim of Africa, will ask you to carry all your toilet paper out with you, so make sure you have a few Ziploc bags.
Take a small airline toothbrush or cut one down to make it more compact.
I used to take a small airline toothpaste, or if I didn’t have any available, I squeezed some toothpaste into a small container.
Nowadays, however, I use Earthly toothpaste tablets! Way more eco-friendly and I can literally count out the exact number I need.
If you are hiking with friends, then this is something you can share.
Some people don’t take deodorant. Some people do.
And some people take an Alum stone.
It depends on when and where you are hiking. This is unnecessary if there are no mozzies in the area or it’s not mozzie season. I would take a small stick of roll-on or a stick repellent instead of a large can.
Sometimes I carry a small tube of sunscreen. Again I tend to either try and decant some into a small container, share it with someone else, or just use my long sleeve shirt and a wide-brimmed hat.
Make sure you pack any personal medication that you might require. I usually take just the right amount and then 1 day extra.
At least one person in the group should have a phone. We recommend keeping it on Airplane mode so that you don’t get any calls or alarms – plus this helps your battery last longer as well!
Depending on where you’re going and with whom you’re going, it is probably a good idea to carry some form of ID and any Medical Insurance information in a safe and dry location.
Stash away a little cash or a credit card for those ‘just-in-case’ moments. Again keep it secure and dry.
Many backpacks have a little clip inside one of the compartments – things like keys – that you REALLY don’t want to lose half way up a mountain – should get clipped in here! (Been there, almost done that > Major freak out!!)
Miscellaneous
These are a few things that are nice to add to your pack if you have the space. Again, these items might be a necessity for some, while others might be just fine without them.
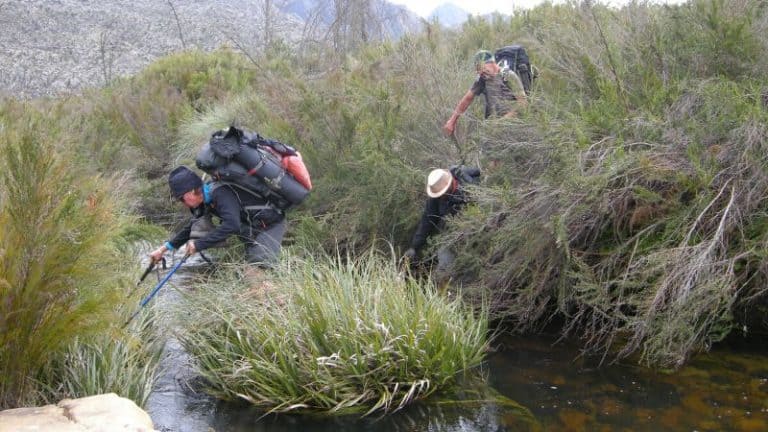
Those who use hiking poles swear by them. Although they weren’t really a thing when I was a kid hiking in the Drakensberg, these days they’re all the rage.
I did end up borrowing some when hiking Rim of Africa and my thoughts are mountainous, steep or rocky – then definitely take them.
I use a Naturehike camping chair. It’s really super to have a comfy seat after a long day’s walk, for chilling around the campfire (if you have one), and for night watch.
I initially used a three-legged stool, but the legs broke in the sand, so I upgraded to the hiking chair, and I love it.
Remember to pack extra batteries. Or take your phone and put it on Airplane Mode. Depending on how long you’re going for and what you might need or want to charge, a solar charger can be a good idea.
We have a Waterproof Solar Charger that we charge up at home beforehand. It’s pretty heavy, so it’s not something I would typically take with me.
For me, this is something I would instead take when I’m camping as opposed to hiking.
This is something that’s pretty useful on a trail in a game/birding area.
That said, they are heavy and bulky.
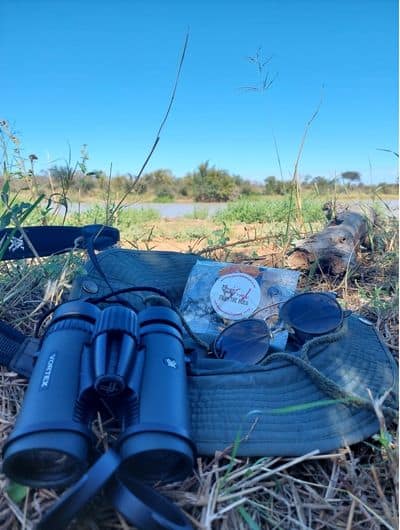
A Bino bra or binocular harness is very useful and makes carrying the binos a lot easier.
I had a twisted stretchy cord, sort of like a lightweight bungee cord, where you tuck whatever you need to hang up into the twists in the line. I absolutely loved it and had it for years until the elastic wore out (it’s on my list to get a replacement).
Pack a compact yet comfortable one. I use an airline pillow and supplement it with my clothes bag. This is a nice-to-have item, but I really like my sleep.
This duo is always a good idea since you can use it to repair shoes, boots, backpacks, and more.
This is something that only one member of the group need carry – it’s useful to have a pile of things that the group can share and divvy them out between everyone.
I tend to wrap some duct tape around my water bottle and hiking poles.
I reckon rather check your laces beforehand, and if they’re looking frayed, get new ones before leaving for your trip.
Or see duct tape above!
For you know what.
There is honestly nothing worse than seeing used toilet paper on an otherwise beautiful trail – so please either
- Burn, dig and cover,
- Carry out, or
- Dig deep and cover
Final Thoughts
And there you have it! As you can tell, there are various considerations on what to pack on a trail, and it will always be situational.
This list has been my staple over years of hiking, but as with all things in life, I’ll continue to add to it and find better or lighter replacements for some of the items.
Do you have any other essentials that go in your backpack that I may have missed? Please let us know so that we can try it out for ourselves!
Feel free to download this article and use this handy hiking gear checklist provided by Trail Food Ambassador Francois Jansen van Vuuren.
And if you haven’t got one already, then here is an Emergency Contact Card that you can download and print off.
Thanks as always to those that have provided the Trail Food Co with images including Di Tipping-Wood, Chloe Cooper, Lowveld Trails, Ashtrails, Ryan Kitcat, Dave Phal and Marek Bozalek.
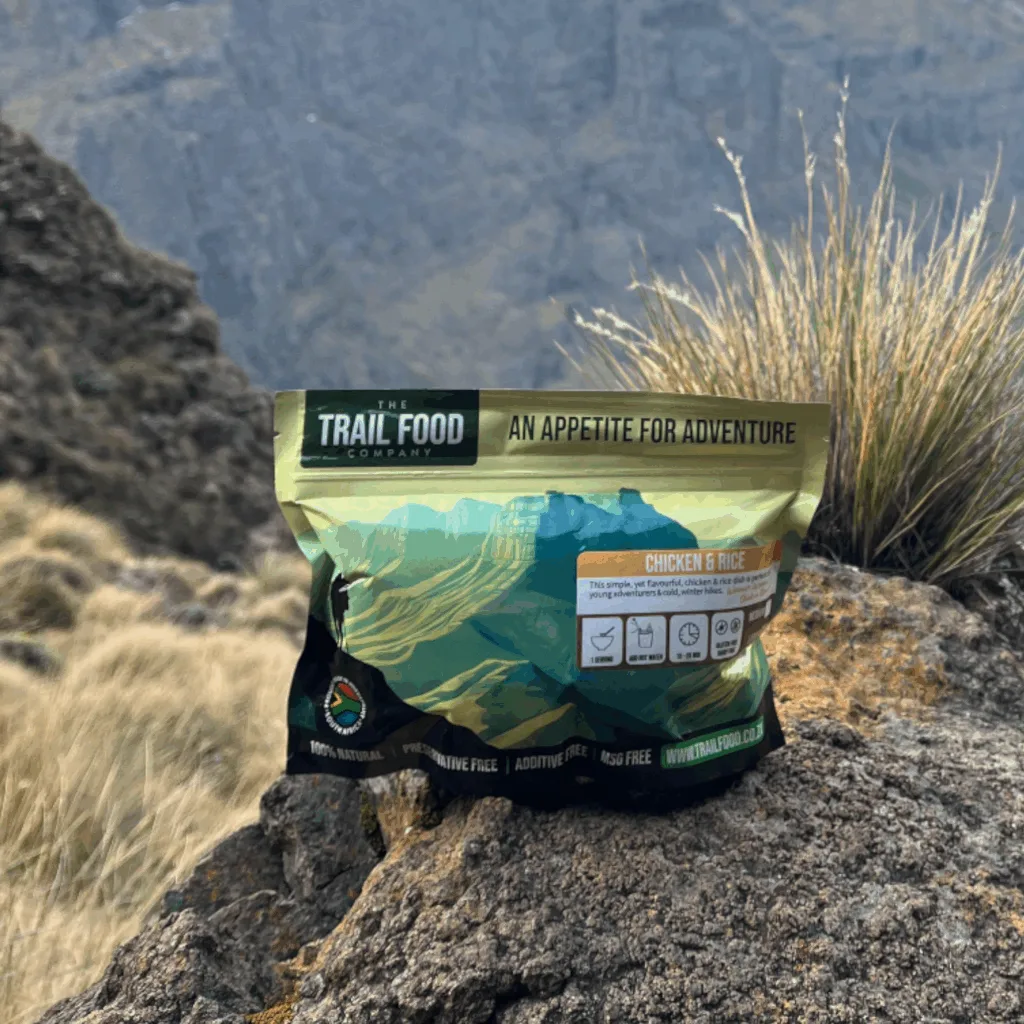
FUEL FOR YOUR ADVENTURES
I'm ready to hike
All our hiking meals are healthy, lightweight, and convenient.
We’ve done all the planning so that you can simply hike!
Ultimate Hiking Guides


Adventure Insights
Featured Products
“Change a life” has been added to your basket. View basket
-
 Main Meals
North African Couscous with Lamb
R75.00 – R170.00Price range: R75.00 through R170.00 Select options This product has multiple variants. The options may be chosen on the product page -

-

-
 Main Meals
Penne Bolognese
R75.00 – R165.00Price range: R75.00 through R165.00 Select options This product has multiple variants. The options may be chosen on the product pageRated 4.78 out of 5